Showing posts with label Use. Show all posts

Saturday, November 8, 2014

5 Tricks to Use Keywords in Your Blog Posts

1. Use keywords in your blog post title.
One of the best ways to incorporate keywords into your blog posts is to use them in your blog post titles.  However, dont sacrifice a titles ability to motivate people to click through and read your entire blog post.  Learn 3 tips to write great blog post titles.
2. Focus on using just one or two keyword phrases in each blog post.
To maximize the traffic that comes to your blog via search engines, focus on optimizating each of your blog posts for just one or two keyword phrases.  Too many keyword phrases dilutes the content of your post for readers and can look like spam to both readers and search engines.  You can learn more about using specific keywords to maximize search traffic by reading about long tail search engine optimization.

3. Use keywords throughout your blog posts.
Try to use your keywords (without keyword stuffing) multiple times in your blog post.  For best results, use your keywords within the first 200 characters of your blog post, several times throughout your post, and near the end of the post.  Take some time to learn more aboutkeyword stuffing and other search engine optimization donts.

4. Use keywords in and around links in your blog post.
Search engine optimzation experts believe that search engines like Google place more weight on linked text than unlinked text when ranking search engine results.  Therefore, its a good idea to include your keywords in or next to the links within your blog posts when its relevant to do so.  Be sure to read about how many links are too many for SEO before you start adding links to your posts.

5. Use keywords in image Alt-tags.
When you upload an image to your blog to use in your blog post, you usually have the option of adding alternate text for that image which appears if a visitor cannot load your images in their Web browsers.  However, this alternate text, can also help your search engine optimization efforts.  Thats because the alternate text appears within the HTML of your blog post content as something called an Alt-tag.  Google and other search engines crawl that tag and use it in providing results for keyword searches.  Take the time to add keywords that are relevant to the image and post in the Alt-tag for each image you upload and publish on your blog.
Friday, October 17, 2014

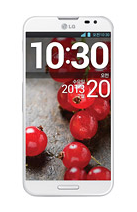
How to Use SmartShare on LG G Pro 2

The SmartShare application uses DLNA (Digital Living Network Alliance) technology to share digital content through a wireless network. Both Phones must be DLNA certified to support this feature.


 - Tap Sharing requests to select an action to perform when receiving sharing requests.
 - Tap Receive files if you would like to allow the other devices to upload media files to my phone.
4. Tap Shared contents and select what type of file you want to share.
NOTE: Make sure that the Receive files option in the Settings menu is checked.
5. SmartShare is now activated and ready to share contents.

To control your renderer devices

Let your renderer device (e.g. TV) play multimedia contents from your remote content library (e.g. PC)

NOTE: Make sure that the DLNA functionality of your devices is properly configured (e.g. TV and PC)

1. From the Home Lcd, tap the Apps Key > SmartShare icon.
2. Tap the Player button and select the device from the renderer device list.
3. Tap the Library button and select the device from the remote content library.
4. You can browse the content library.
5. Tap the Menu Key > Play.

To share contents from your phone to your renderer device (e.g. TV) 

NOTE: Make sure that your renderer device is properly configured.

1. While viewing pictures and videos in the Gallery application, tap at the top of the Lcd.
2. Select the device from the renderer device list to play the files.

NOTE: Follow the similar steps to use the Music, Videos or Polaris Office to share contents.

NOTICE: Check that your device is connected with your home network using Wi-Fi connection to use this application. Some DLNA enabled devices (e.g. TV) support only the DMP feature of DLNA and will
not appear in the renderer device list. Your device might not be able to play some contents.

To download contents from the remote content library

1. From the Home Lcd, tap the Apps Key > SmartShare .
2. Tap the Library button and select the device from the remote content library.
3. You can browse the content library.
4. Tap and hold a content thumbnail and then touch Download.

NOTICE: A few types of contents are not supported.

To upload contents from the remote content library

1. From the Home Lcd, tap the Apps Key > SmartShare .
2. Tap the Library button and select My phone.
3. You can browse the content library.
4. Tap and hold a content thumbnail and then touch Upload.
5 Select a device from the remote content library to be uploaded.

NOTICE: Some DLNA enabled devices do not support the DMS upload functionality and will not upload files. A few types of contents are not supported.

Sunday, October 12, 2014

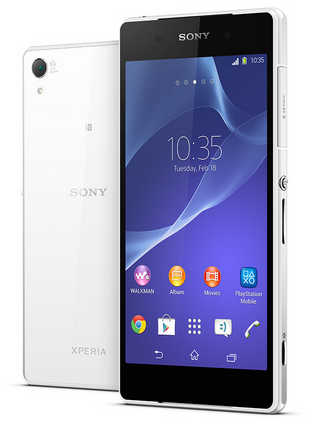
How to Use NFC on Sony Xperia Z2 Share Contacts Music Files Photo or Video and Web Address

NFC feature is a must-have for any smartphones these days.  Near-field communication or NFC works similarly like bluetooth. By touching your NFC-enabled phones against each other, you can then share contacts, music and photos. Well, heres how you can easily share contacts on Sony Xperia Z2 uisng NFC feature.

1. On your Home Lcd, tap the Apps icon Settings.

2. Then go to More.

3. Mark the NFC checkbox.

To share a contact with another device using NFC

1. Make sure that both devices have the NFC function turned on, and that both Lcds are active.

2. To view contacts, go to your Home Lcd, tap Apps icon, then tap Person icon.

3. Tap the contact that you want to share.

4. Hold your device and the receiving device back to back so that the NFC detection areas of each device touch each other. When the devices connect, a thumbnail of the contact appears.

5. Tap the thumbnail to start the transfer.

6. When the transfer is done, the contact information is displayed on the Lcd of the receiving device and is also saved on the receiving device.

To share a music file with another device using NFC

1. Make sure that both your device and the receiving device have the NFC function turned on, and that both Lcds are active.

2. To open the "WALKMAN™" application, tap Apps icon, then find and tap Walkman icon.

3. Select a music category and browse to the track you want to share.

4. Tap the track to play it. You can then tap Pause icon to pause the track. The transfer works whether the track is playing or paused.

5. Hold your device and the receiving device back to back so that the NFC detection areas of each device touch each other. When the devices connect, a thumbnail of the track appears.

6. Tap the thumbnail to start the transfer.

7. When the transfer is done, the music file plays immediately on the receiving device. At the same time, the file is saved on the receiving device.

To share a photo or video with another device using NFC

1. Make sure that both devices have the NFC function turned on, and that both Lcds are active.

2. To view photos and videos in your device, go to your Home Lcd, tap Apps icon, then find and tap Album.

3. Tap the photo or video that you want to share.

4. Hold your device and the receiving device back to back so that the NFC detection areas of each device touch each other. When the devices connect, a thumbnail of the track appears.

5. Tap the thumbnail to start the transfer.

6. When the transfer is done, the photo or video is displayed on the Lcd of the receiving device. At the same time, the item is saved on the receiving device.

To share a web address with another device using NFC

1. Make sure that both devices have the NFC function turned on, and that both Lcds are active.

2. From your Home Lcd, tap Apps icon.

3. To open the web browser, find and tap Chrome browser icon.

4. Load the web page that you want to share.

5. Hold your device and the receiving device back to back so that the NFC detection areas of each device touch each other. When the devices connect, a thumbnail of the track appears.

6. Tap the thumbnail to start the transfer.

7. When the transfer is done, the web page is displayed on the Lcd of the receiving device.

Tuesday, September 9, 2014

How To Use VPN With The Apple iPad

Using VPN with The Apple iPad And iPad 2

..."Can You Get Secure Connections From A Wireless Tablet, Yes You Can"...

While there are plenty of ways to protect your iPad and its data from neer do wells, one way is of specific interest to business users. The Virtual Private Network, or VPN for short. out of the box with no additional software the iPad supports three kinds of VPNs (Layer 2 Tunneling Protocol L2TP, Point To Point Tunneling Protocol PPTP, amd Cisco IPSec Stands for internet Protocol Security. All three of them do pretty much the same thing, just in different ways. The kind of VPN you set up on the your iPad depends entirely on the kind of VPN thats set up on the network youre connecting to.

The iPad also supports what is also known and called SSL VPNs, which use the same SSL protocols that Websites use when they want to secure the connection so you can send sensitive data to them without worrying someone else sniffing that data for their own purposes. The iPad supports SSL VPNs from Juniper Cisco And F5 although you need to download clients for those from the iTunes APP Store. you can also create your own custom SSL VPN setup if you want.

Setup
I cant provide details for every possible VPN setup but I can explain the setup for Cisco IPSec. Its relatively common, and its the one I use. Youll follow the same general procedure for any of the others. Start by going into settings, and then tap VPN. Select add VPN Configuration and then IPSec. There, youll need to fill in a configuration Lcd with the following Details:

Server (The IP Address or DNS Name Of The VPN Router)
Account (Also known as user ID)
Password
Either A Certificate (Which will be provided for your iPad by the VPN Administrator)
Group Name (Used to assign appropriate access privileges to different types of users for example: your IT group likely has different kinds of access than does a sale team).

Before you go to there trouble of entering all of that manually check with your IT Department. It may be able to use Apples iPhone configuration utility to create a configuration profile which you install on the iPad and which configures the VPN for you.

How To Use It
Once the VPN is set up using it is simple. When you want to connect to your VPN you reopen settings tap VPN select the configuration you want to use and tap the VPN on/off switch. Enter a password a couple of seconds later you should be connected. At that point you can connect to your network and do whatever you need to do and it should just work. The only visible sign that youre using a VPN at all is the small icon in the upper left corner of the Lcd. When youre done, go back into the VPN settings and tap on VPN on/off switch and the VPN connection will be terminated.

If youre using SSL VPN you can take advantage of VPN on Demand. Then you dont even have to turn it on. Whenever you try to access a site or a resource behind the VPN, the VPN will automatically start for you and quit when your done, simple and amazing isnt it. As with so many other things Apple has done a good job of making some ferocious technology easy to use. Setting up a VPN on the back end may be a truly tedious and annoying process. Connecting to one from an iPad is anything but annoying and tedious. The iPad makes it simple and thats what Apple is all about Simplifying your world around you.