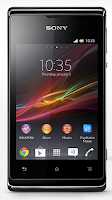
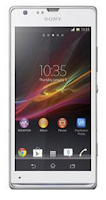
| Sony Xperia Sola – MT27i |
| General and Software |
|
| Countries | Global |
| Series | Xperia |
| Other names or variations | Xperia MY27i - Sony MT27i - Sony Pepper - Sony Xperia Pepper – MT27i Pepper |
| Form Factor | Candybar |
| Operating System | Android 2.3 Gingerbread |
| Operating System (download) | Android 4.0 Ice Cream Sandwich |
| Physical Keyboard | No - Onscreen virtual QWERTY keyboard |
| Announced | 13 March 2012 |
| Status Available | Q2 2012 |
| Browser & Internet | WebKit browser. Full Internet browser with support for standard protocols, images and video. (RSS Feeds, XHTML,, HTML5, CSS3, WAP 2.0)
Media Browser - Pan & zoom - Booksmarks |
| Adobe Flash Support | Adobe Flash Player |
| Java | MIDP |
| Display |
|
| Size, diagonal | 3.7 inches - 93.98 mm |
| Display Resolution | 480 x 854 pixels |
| Generalized Pixel Density | 265 ppi |
| TFT – Touchscree – Capacitive – 16,777,216 colour – scrath-resistant glass – Reality display with Mobile BRAVIA Engine |
| Connectivity |
|
| WAN / Network 2G | GSM: 850 / 900 / 1800 / 1900 Mhz |
| WAN / Network 3G | W-CDMA / UMTS: 850 / 900 / 1900 / 2100 Mhz |
| WAN / Data | GPRS / EDGE - HSDPA: 14.4 Mbps; HSUPA: 5.76 Mbps |
| Wireless LAN | Wi-Fi 802.11 b / g / n - hotspot - DLNA (Digital Living Network Alliance) – Wi-Fi Hotspot – Tethering |
| Bluetooth | Bluetooth v. 2.1 + A2DP (Advanced Audio Distribution ) + EDR (Enhanced Data Rate) |
| USB | USB High speed 2.0 – USB mass storage – Charging connector - Native USB tethering |
| Audio/Video Output | HDMI – TV out |
| Audio jack 3,5 mm | 3.5 mm audio jack (CTIA) |
| Infrared port | No |
| GPS / Location Based Services | GPS – Google Maps – Street View – Google Latitude – Wisepilot turn-by-turn navigation |
| NFC (Near Field Communication) - Media Transfer Protocol support – Media Go – NeoReader barcode scanner |
| Camera |
|
| Camera Resolution (max) | 5 megapixels – 2592 x 1944 pixels |
| Camera Focus | Autofocus |
| Camera Flash | Flash LED |
| Camera Zoom (max) | Digital zoom 16x |
| Image Capture Formats | JPEG |
| Additional Camera Features | Self-timer - Video light – Video calling - Send to web – Smile detection – Face detection – Red-eye reduction – Geotagging – 3Dsweep panorama |
| Image playback, supported formats: BMP, GIF, JPEG, PNG, WBMP |
| Media |
|
| Media Formats | Android core media formats |
| Audio Player | MP3, AAC, AAC+, eAAC+, WAV, WMA, AMR, OGG, MIDI |
| Video Player | MPEG4, H.263, H.264, WMV |
| Video Recording | 720p HD (1280 x 720 pixels) - supported formats: 3GPP, MP4 |
| Video Recording Frame Rate | 30 fps |
| Video Playback | 720p HD (1280 x 720 pixels) |
| Video Playback Frame Rate | 30 fps |
| Speakerphone | Yes |
| Loudspeaker | Yes |
| Radio FM | Stereo FM radio + RDS |
| Voice Recording | Voice dialing - Voice commands - Voice recording |
| Clear stereo - Clear bass - xLOUD Experience - TrackID music recognition – PlayNow services - Music player - Album art |
| Processor and memory |
|
| Processor / SoC | Chipset STEricsson NovaThor U8500 – CPU: 1GHz Dual-core ARM Cortex-A9 – ARMv7 – GPU: ARM Mali 400 MP (single-core) – LP-DDR2 – 2011 |
| Processor Clock Speed | 1 GHz |
| RAM | 512MB |
| Internal memory | 8 GB (up to 5 GB user-accessible memory) |
| Memory Card Type | MicroSD |
| Memory Card Size Supported | Up to 32GB |
| Sensors |
|
| Accelerometer | Yes |
| Digital Compass | Yes |
| Proximity Sensor | Yes |
| Ambient Light Sensor | Yes |
| Notifications | Vibration, MP3, AAC, polyphonic (downloadables) |
| Power |
|
| Battery Type | Standar battery Li-ion 1320 mAh |
| Talk time | 2G: 6 hours – 3G: 5 hours |
| Stand-by time | 2G: 470 hours – 3G: 475 hours |
| Music listening: 40 hours - Video playback: 6 hours |
| Divers |
|
| Messaging | SMS, MMS, IM (Google Talk), Email (IMAP, POP3, SMTP, Google Mail, Push Email), conversations. |
| Games | Yes, downloadable – Motion gaming – PlayStation Certified – 3D Game |
| Color | Black, White, Red |
| Phone Book | Yes |
| Organizer | Yes |
| Agenda | Yes |
| Calendar | Yes |
| Task | Yes |
| Notes | Yes |
| Predictive text | Yes |
| Watch | Yes |
| Alarm | Yes |
| Diary | Yes |
| Calculator | Yes |
| Document Viewer | Yes |
| Flight mode | Yes |
| Weight | 107 grams (3.8 oz) |
| Dimensions | 116.0 x 59.0 x 9.9 mm (4.6 x 2.3 x 0.4 in) |
| Xperia Timescape – Twitter Timescape integration -- Noise suppresion – Facebook inside Xperia – Facebook application |
| Full suite of Google mobile services: Gmail – Google Calendar – Google Contact Sync – Google Latitude – Google Maps Street View – Google Maps – Google Maps Navigation – Google Quick Search Box – Google Talk – Google eBooks – Google Search by Voice – YouTube – Google+ - Google Play |
| Computer Sync - OTA Sync – Corporate Sync – Exchange ActiveSync – Google Sync – Facebook Sync |
| Picture wallpaper – Wallpaper animation – Screen capture |
| Modem: Connect your computer to the Web using your phone wherever you are. |
 Apparently, negotiations between Sony and Sharp on the establishment of a joint venture to produce LCD panels coming to an end. According to the newspaper The Nikkei, which is considered the mouthpiece of the business community in the country of the Rising Sun, by the end of this month, the two companies will conclude an agreement under which Sony will invest about U.S. $ 1.1 billion in new venture for the production of LCD Sharp in Sakai (Sakai) to the west Japan. According to preliminary data, its share in this joint venture will be 34 percent. Although the two companies reached a preliminary agreement at the beginning of the year, a formal agreement on this issue will be signed until next week.


.jpg)


